How to grow tomatoes – 8 Simple Steps for a Bumper Harvest
If you’ve ever wanted to know how to grow tomatoes that actually taste like tomatoes — not the pale, mealy supermarket kind — you’re in the right place. Home-grown tomatoes are one of the most rewarding crops a gardener can raise, yet a surprising number of first-timers end up with leggy plants, cracked fruit, or a tiny yield. This guide walks you through every stage, from seed to harvest, with practical detail you can act on today.
Table of Contents
What You’ll Need
Before you get started, gather these essentials. Having everything on hand makes the whole process smoother and cuts down on avoidable mistakes mid-season.
- Seeds or transplants — choose a variety suited to your climate and space (more on this in Step 1)
- Seed-starting mix or quality potting compost — regular garden soil compacts too much in pots
- Seed trays or small pots — 7–9 cm pots work well for individual seedlings
- A bright, warm windowsill or grow light — tomatoes need plenty of light from the very start
- Larger containers or a prepared garden bed — at least 30–40 litres per plant if container growing
- Stakes, cages, or a trellis system — essential for indeterminate (vining) varieties
- Balanced starter fertilizer and a high-potassium tomato feed — different nutrients at different stages
- Watering can or drip irrigation — consistent moisture is non-negotiable
- Gloves, trowel, and pruning snips — basic kit you probably already own
Step 1: Choose the Right Tomato Variety
The single biggest factor in whether you succeed when you learn how to grow tomatoes is picking the right variety for your situation. There are two broad plant types: determinate (bush) varieties, which grow to a fixed height and ripen most of their fruit at once, and indeterminate (cordon or vining) varieties, which keep growing and producing all season until frost kills them.
For small patios and balconies, compact determinate types like ‘Tumbling Tom’, ‘Patio F1’, or ‘Bush Early Girl’ are excellent — they don’t need much staking and do brilliantly in hanging baskets. If you have open garden beds or a greenhouse, indeterminate varieties like ‘Sungold’, ‘Gardener’s Delight’, ‘Brandywine’, or ‘Black Krim’ reward the extra space with exceptional flavour and long harvests.
Also consider disease resistance. Varieties labelled VFN carry resistance to Verticillium wilt, Fusarium wilt, and nematodes — a real help if your soil has a history of problems. For beginners in particular, a disease-resistant hybrid is often the smartest starting point.
Step 2: Start Seeds at the Right Time
Timing is everything. Start seeds indoors too early and you’ll have tall, stressed plants before the soil is warm enough outside. Start too late and you lose precious weeks of the growing season. As a general rule, sow tomato seeds indoors 6–8 weeks before your last expected frost date.
Fill small pots or seed trays with moist seed-starting mix, sow seeds about 6 mm deep, and cover lightly. Place them somewhere warm — a soil temperature of around 21–27 °C is ideal for germination, which typically takes 5–10 days. A heat mat placed under the trays speeds things up reliably. Once sprouts appear, move them to your brightest window or under grow lights (14–16 hours of light per day) to prevent the spindly, stretching growth that happens when seedlings chase weak light.
Label each variety clearly. It sounds obvious, but mixed-up seedlings are a surprisingly common frustration among new gardeners exploring how to grow tomatoes for the first time.
Step 3: Pot Up and Harden Off Your Seedlings
Once seedlings have their first true leaves (the second set of leaves after the initial seed leaves), it’s time to pot them up into a 9–10 cm container with fresh potting compost. Tomatoes are one of the few plants that benefit from being buried deep — the stem develops roots along its length, creating a stronger plant. Bury the seedling up to its lowest set of leaves.
When outdoor temperatures are reliably above 10 °C during the day, begin hardening off: set plants outside in a sheltered spot for an hour on day one, then gradually increase exposure over 10–14 days until they’re spending full days outdoors. This acclimatisation step prevents transplant shock and is one of those details that separates confident growers from frustrated ones.
Don’t rush this phase. A plant hardened off properly will outperform a plant rushed outside every single time.
Step 4: Transplant into Their Final Position
Knowing how to grow tomatoes successfully depends heavily on where and how you transplant. Wait until nighttime temperatures stay above 10 °C consistently — tomatoes planted into cold soil simply sit there, stressed, and often fall prey to disease. In most temperate climates, that means late May to early June.
Choose a spot that receives at least 6–8 hours of direct sun per day. Prepare garden beds by digging in a generous amount of well-rotted compost or aged manure. For container growers, use a high-quality potting mix and choose a pot of at least 30–40 litres — larger is nearly always better, because tomatoes are hungry, thirsty plants that struggle in undersized pots.
Plant deep again, burying the stem up to the lowest set of leaves just as you did when potting up. Space plants 45–60 cm apart in rows 90 cm apart to allow good airflow, which reduces the risk of fungal disease. Water in well after planting, and install your stakes or cage at the same time to avoid disturbing roots later.
For a deeper look at tomato cultivation advice from the Royal Horticultural Society, their growing guides are thoroughly researched and regularly updated.
Step 5: Water Consistently and Wisely
Inconsistent watering is the root cause of two of the most common tomato problems: blossom end rot and fruit cracking. When you’re figuring out how to grow tomatoes, getting your watering rhythm right is genuinely one of the most impactful things you can do.
Aim to keep the soil evenly moist — not waterlogged, not bone dry. In hot weather, outdoor tomatoes in containers may need watering once or even twice a day. Garden-bed plants can usually manage every 2–3 days, though this depends on your soil type and local climate. A thick mulch of straw, wood chips, or compost around the base of each plant conserves moisture dramatically and keeps soil temperature stable.
Always water at the base of the plant, not over the foliage. Wet leaves encourage the spread of diseases like early blight and late blight. Drip irrigation or soaker hoses are worth setting up if you’re growing more than a handful of plants — they save time and deliver water exactly where it’s needed.
Step 6: Feed Your Plants at Every Stage
Tomatoes are heavy feeders, and the nutrients they need shift as they move through different growth stages. This is one of the finer points of how to grow tomatoes that often gets glossed over in basic guides.
For the first few weeks after transplanting, use a balanced fertilizer — one with roughly equal nitrogen, phosphorus, and potassium — to support strong root and leaf development. Once you see the first flower clusters forming, switch to a high-potassium (high-K) tomato feed. High nitrogen at this stage encourages lush foliage at the expense of fruit set, which is the opposite of what you want.
Liquid feeds applied weekly are more flexible than slow-release granules because you can adjust the dose as conditions change. Seaweed extract used as a fortnightly drench also supports overall plant health and can improve stress tolerance during heatwaves. A well-fed plant will repay you with noticeably heavier crops.
Shop Top-Rated Tomato Fertilizers on Amazon →
Step 7: Prune, Support, and Train Your Plants
For indeterminate varieties, pruning and training are central to how to grow tomatoes that produce well rather than simply grow enormous. The key practice is removing suckers — the shoots that emerge from the junction between the main stem and a side branch. Left to grow, suckers become full branches, the plant becomes an unmanageable jungle, and airflow drops, inviting disease.
Pinch out suckers when they’re small — under 2.5 cm — either with your fingers or a clean pair of snips. It takes less than a minute per plant and pays dividends all season. Tie the main stem loosely to your stake every 20–30 cm as it grows, using soft twine or purpose-made tomato clips.
In late summer, about four weeks before your first expected frost, pinch out the growing tip of each plant entirely. This redirects the plant’s energy into ripening the fruit it already has rather than setting new ones that won’t mature before cold weather arrives. It’s a small act that meaningfully improves your end-of-season harvest.
Determinate bush varieties need much less pruning — light removal of damaged or crossing shoots is usually enough. Check the University of Minnesota Extension’s tomato growing guide for excellent illustrated pruning advice.
Step 8: Recognise Problems Early and Act Fast
Even careful gardeners encounter pests and diseases, and knowing how to grow tomatoes through adversity is as important as getting the early stages right. The most common issues include:
- Early blight — brown spots with yellow halos on lower leaves; remove affected leaves, avoid overhead watering, and apply a copper-based fungicide if it spreads
- Late blight — dark, water-soaked patches that spread rapidly in cool, wet weather; act immediately with a registered fungicide and remove heavily infected plants
- Blossom end rot — a dark, leathery patch at the base of the fruit; caused by calcium deficiency triggered by irregular watering, not a true nutrient problem — fix your watering routine first
- Aphids and whitefly — knock off with a strong jet of water or use an insecticidal soap spray; encourage natural predators like ladybirds
- Tomato hornworm — large green caterpillars that can strip foliage overnight; hand-pick them or apply Bacillus thuringiensis (Bt) spray
Inspect plants every couple of days. Catching a problem when it’s a handful of spotted leaves is far easier than managing a full-blown outbreak. The Gardening Know How tomato problems guide is a handy visual reference for diagnosing issues in the field.
Step 9: Harvest at the Right Moment
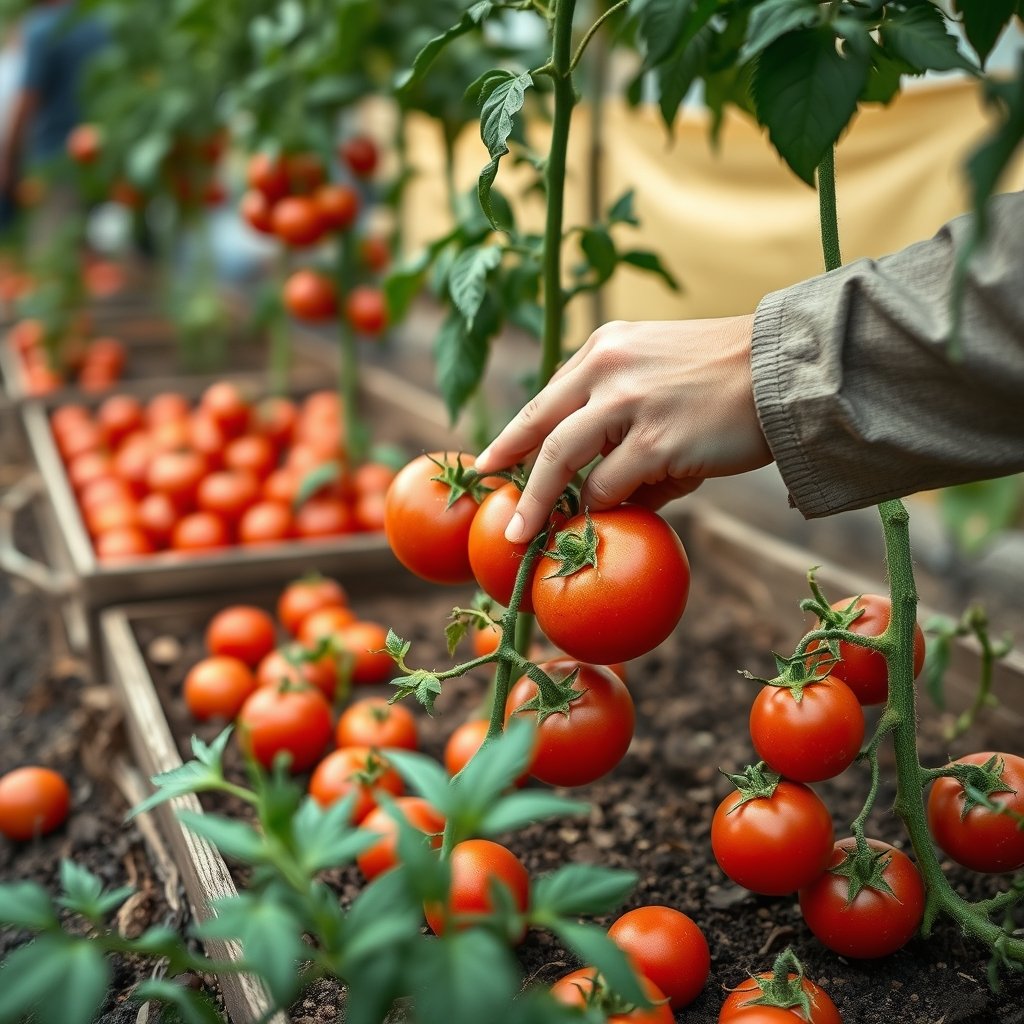
All of the effort you’ve put into learning how to grow tomatoes pays off right here. The best time to harvest depends on the variety, but most tomatoes are ready when they’ve reached their mature colour — whether that’s red, orange, yellow, or purple — and give very slightly to gentle thumb pressure. Don’t wait for them to be fully soft; they’ll continue ripening off the vine.
If a heatwave is forecast above 32 °C, pick tomatoes that are just turning colour and let them ripen indoors at room temperature. Temperatures that high actually prevent lycopene and carotenoid development, leaving fruit pale and flavourless. Never refrigerate unripe tomatoes — cold temperatures below 13 °C destroy texture and flavour irreversibly.
At the end of the season, when frost threatens, pick all remaining fruit regardless of colour. Green tomatoes ripen slowly indoors, especially if stored alongside a ripe banana or apple, which emit ethylene gas. You’ll be eating home-grown tomatoes well into autumn.
Common Mistakes to Avoid
- Planting out too early — cold soil and frost damage set plants back by weeks
- Choosing a shady spot — six hours of sun is the minimum; eight is better
- Overwatering (or underwatering) — both extremes cause cracking, rot, and poor fruit set
- Skipping the hardening-off stage — moving plants straight from indoors to outdoors shocks them badly
- Neglecting to prune suckers on indeterminate varieties — leads to overcrowded, disease-prone plants
- Using high-nitrogen feed once flowering starts — you’ll get a beautiful green plant with very few tomatoes
- Watering over the foliage — wet leaves are an open invitation for fungal disease
- Planting in the same spot every year — rotate crops every 3–4 years to break disease and pest cycles
Final Thoughts
Mastering how to grow tomatoes is genuinely one of the most satisfying things you can do as a home gardener. The gap in flavour between a shop-bought tomato and one you’ve grown yourself, picked sun-warm from the vine, is remarkable — and once you’ve experienced it, going back feels impossible.
Start with one or two reliable varieties, nail the fundamentals of sun, water, and feeding, and don’t be discouraged if your first season throws up a few problems. Every experienced grower has dealt with blight, blossom end rot, or a hornworm surprise. The knowledge you build each year compounds, and by season three you’ll be the person neighbours ask for growing advice.
With the eight steps in this guide, you now have a clear, practical roadmap. Follow them, stay observant, and you’ll be harvesting more tomatoes than you know what to do with before the summer is out.
Frequently Asked Questions
How long does it take to grow tomatoes from seed to harvest?
Most tomato varieties take between 60 and 85 days from transplanting into their final position to first harvest. From seed, add another 6–8 weeks for indoor growing — so the full journey from sowing to eating is typically 3.5 to 5 months, depending on the variety and your local climate.
Can I grow tomatoes in containers on a balcony?
Absolutely. Container growing is one of the most popular approaches to growing tomatoes at home, particularly in urban settings. Use a pot of at least 30–40 litres per plant, a quality potting mix, and a compact or determinate variety. Water and feed more frequently than you would for garden-bed plants, as containers dry out and deplete nutrients faster.
How to grow tomatoes if I only have partial shade?
Tomatoes really do need a minimum of six hours of direct sun daily to set fruit well. In partial shade (four to five hours), you’ll still get foliage growth but fruit production will be disappointing and disease pressure increases. If your outdoor space is shaded, try a south-facing windowsill, a grow light setup indoors, or a bright conservatory — some growers have excellent results that way.
Why are my tomato plants flowering but not setting fruit?
The most common causes are temperature extremes (fruit set drops when daytime temperatures exceed 32 °C or nighttime temperatures fall below 10 °C), lack of pollination, or too much nitrogen in your feed. Gently shaking the flower clusters daily mimics the vibration bees provide and helps with indoor or greenhouse pollination. Switching to a high-potassium tomato feed at the flowering stage is usually the most immediate fix.