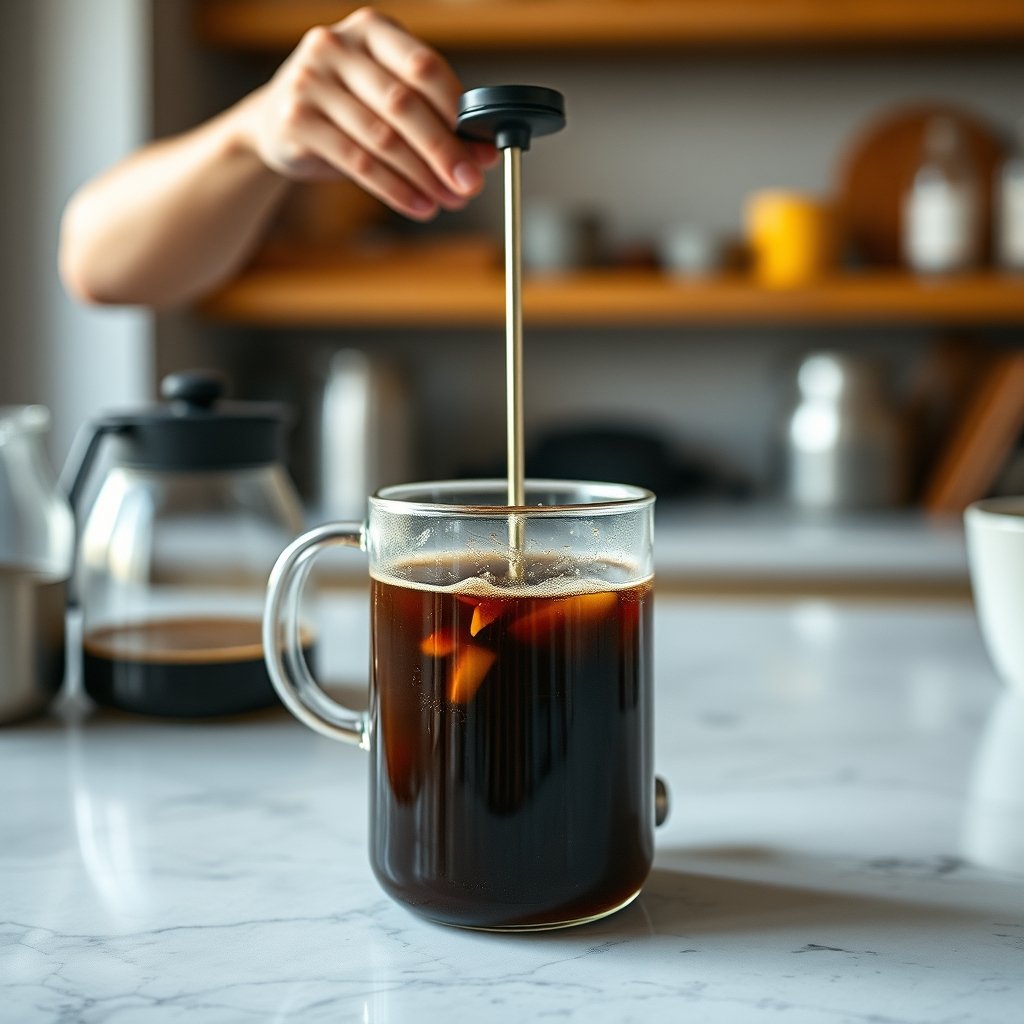
How to make cold brew coffee – 7 Easy Steps for a Perfect Cup
If you want to know how to make cold brew coffee, you’ve landed in exactly the right place. Cold brew is one of the smoothest, most satisfying ways to enjoy coffee — naturally low in acidity, rich in flavour, and surprisingly simple to pull off at home. Whether you’re tired of watery iced coffee or you just want a silky concentrate ready in the fridge all week, mastering how to make cold brew coffee will genuinely change your morning routine.
Table of Contents
What You’ll Need
One of the best things about learning how to make cold brew coffee is that the equipment list is short. You don’t need an espresso machine or any professional gear. Here’s what to gather before you start:
- Coarsely ground coffee — a medium-to-dark roast works beautifully; think Colombia, Brazil, or Ethiopia natural process
- Cold or room-temperature filtered water — tap water is fine if it tastes good to drink
- A large jar or pitcher — a 32 oz (1-litre) mason jar is the classic choice
- A fine-mesh strainer — or a dedicated cold brew maker with a built-in filter
- Cheesecloth or a paper coffee filter — for a second, cleaner pass if you want crystal-clear concentrate
- A kitchen scale (optional but recommended) — eyeballing ratios is possible, but weighing gives consistent results
- A refrigerator — or a cool, dark countertop spot if you prefer a faster room-temperature steep
That’s genuinely all there is to it. Once you’ve gathered these items, the process of how to make cold brew coffee is mostly hands-off time.
Step 1: Choose the Right Coffee Beans
The foundation of how to make cold brew coffee well is bean selection. Cold water extracts coffee differently from hot water — it pulls out fewer of the sharp, bright acids and more of the chocolatey, caramel-like compounds. That means a medium or dark roast tends to shine here, producing a brew that feels naturally sweet and round.
Light roasts aren’t off-limits, though. Ethiopian or Kenyan light roasts can produce a floral, fruity cold brew that’s genuinely lovely — just expect it to taste a little thinner compared to a darker bean. Whatever you choose, buy whole beans and grind them yourself if possible; pre-ground coffee goes stale quickly and cold brew steeps for many hours, so freshness matters.
Single-origin coffees from Sweet Maria’s green coffee library are a great reference point for understanding how different origins taste in cold extraction, even if you buy roasted retail beans.
Step 2: Grind Your Coffee Coarsely
Grind size is arguably the most important variable when you’re figuring out how to make cold brew coffee. You want a coarse grind — roughly the texture of raw sugar or coarse sea salt. Think of it as slightly coarser than what you’d use for a French press.
Why coarse? A fine grind has much more surface area, which speeds up extraction dramatically. In a cold brew steep that lasts 12–24 hours, fine grounds will over-extract and turn bitter and muddy. A coarse grind gives the cold water time to work slowly, pulling out sweetness and body without the harsh edges.
If you’re using a blade grinder rather than a burr grinder, pulse in short bursts and stop before the grounds look powdery. A burr grinder — even an inexpensive hand grinder — will give you much more consistent particle size, which translates directly into a better-tasting cup.
Step 3: Nail the Coffee-to-Water Ratio
Getting the ratio right is central to how to make cold brew coffee that actually tastes good. The most common starting point is a 1:4 ratio by weight for concentrate — that’s 1 part coffee to 4 parts water. So for a 32 oz jar, you’d use roughly 115 g (about 4 oz) of coarsely ground coffee with 460 ml of water.
This produces a concentrate you then dilute 1:1 with water, milk, or oat milk when serving. If you’d prefer a ready-to-drink brew rather than a concentrate, bump the ratio to 1:8 (e.g., 60 g coffee to 480 ml water) and you can drink it straight without diluting.
Don’t stress about being exact to the gram on your first try. Ratios are starting points, not laws. Once you understand how to make cold brew coffee at your preferred strength, you’ll naturally tweak from there.
Step 4: Combine Coffee and Water
Now the hands-on part of how to make cold brew coffee begins — and it’s satisfyingly simple. Add your coarsely ground coffee to your jar or pitcher first, then pour the water slowly over the grounds. Pouring water over coffee (rather than the other way around) helps ensure all the grounds get wet evenly.
Give the mixture a gentle stir with a long spoon to make sure there are no dry pockets of coffee sitting at the top or bottom. You’re not trying to agitate the mixture vigorously — just a slow fold to saturate everything.
If you’re using a dedicated cold brew maker like the OXO Cold Brew Coffee Maker, you simply add the grounds to the mesh basket, place it over the glass carafe, and pour water through. The design handles even saturation automatically.
Shop Cold Brew Coffee Makers on Amazon →
Step 5: Steep at the Right Time and Temperature
This step is where how to make cold brew coffee earns its name — patience. Cold brew needs time, and getting the steep right means choosing both a temperature and a duration.
Refrigerator steep (cold): Cover your jar and place it in the fridge for 18–24 hours. Cold temperatures slow extraction, so you need the longer end of this range to get a full-flavoured result. This method is the most forgiving — you can leave it up to 24 hours without worrying about over-extraction.
Room-temperature steep (fast): Leave the jar on your counter, covered, for 12–14 hours. Room temperature speeds up extraction considerably. Don’t push this beyond 14 hours or the brew can turn astringent. This is a good option when you forget to plan ahead.
We recommend the cold fridge method for beginners — it’s more flexible and consistently produces a smoother result. Once you understand how to make cold brew coffee with the cold method, you can experiment with room-temperature steeping later.
Step 6: Strain the Coffee Carefully
After your steep is complete, the next stage of how to make cold brew coffee is straining — and doing it well makes a real difference to the final texture. Rush this step and you end up with gritty, cloudy coffee.
Here’s the cleanest approach:
- Place a fine-mesh strainer over a second jar or large bowl.
- Pour the steeped coffee slowly through the strainer to catch the bulk of the grounds.
- For a second, cleaner pass, line the strainer with a paper coffee filter or two layers of cheesecloth and pour the coffee through again.
- Don’t press or squeeze the grounds — let gravity do the work. Squeezing pushes bitter, astringent compounds into your concentrate.
The resulting liquid should look like a dark amber or mahogany concentrate. It’ll feel thick and smell incredible. That’s how to make cold brew coffee concentrate the right way.
For a deep dive into the science of coffee extraction temperatures and why cold water behaves differently, this peer-reviewed study published in Scientific Reports breaks down the chemistry in accessible terms.
Step 7: Store, Serve, and Enjoy
The final step in how to make cold brew coffee is storage and serving. Cold brew concentrate keeps well in a sealed jar or bottle in the fridge for up to two weeks — though honestly, it rarely lasts that long.
To serve as an iced drink: Fill a glass with ice, pour equal parts concentrate and cold water (or your milk of choice) over the ice, and stir. A splash of oat milk or whole milk adds a creamy, rounded flavour that pairs beautifully with the chocolatey notes of a dark roast concentrate.
To serve hot: Yes, you can dilute cold brew concentrate with hot water rather than cold. It makes for a surprisingly gentle, low-acid hot coffee — great for people who find regular hot-brewed coffee hard on their stomachs.
Flavour variations: Add a dash of vanilla extract, a pinch of cinnamon, or a drizzle of maple syrup. These small additions layer naturally over the smooth base that comes from knowing how to make cold brew coffee properly. The National Coffee Association’s annual drinking trends report notes that flavoured cold brew is consistently one of the fastest-growing coffee categories — so you’re in good company.
Common Mistakes to Avoid
Even once you know how to make cold brew coffee in theory, a few easy missteps can undermine your results. Watch out for these:
- Grinding too fine: This is the number-one reason cold brew turns bitter. Always aim for coarse, even grounds.
- Under-steeping: Pulling the brew at 8 hours will leave you with a weak, under-developed concentrate. Give it at least 12 hours (room temp) or 18 hours (fridge).
- Over-steeping: Leaving coffee steeping for 30+ hours — especially at room temperature — will extract harsh, unpleasant compounds. Set a timer.
- Using bad-tasting tap water: Water is 98% of your brew. If your tap water tastes odd, use filtered water. It makes a meaningful difference.
- Skipping the second strain: A single pass through a mesh strainer often leaves fine sediment that settles at the bottom of your glass. A paper-filter pass gives you that clean, café-quality clarity.
- Drinking concentrate straight: If you made a 1:4 concentrate and it tastes overwhelmingly strong, that’s intentional — dilute it before judging the flavour. Many first-timers abandon a perfectly good batch thinking they did something wrong.
- Storing in a poorly sealed container: Coffee absorbs fridge odours fast. A mason jar with a tight lid or a dedicated pitcher with a sealed cap keeps your concentrate tasting clean all week.
How to make cold brew coffee faster: The Jar-Shake Method
If you need cold brew in a hurry, there’s a shortcut worth knowing. Some baristas use a brief agitation technique — combining coffee and water in a sealed jar, shaking it gently for about 60 seconds, then letting it rest for just 4–6 hours in the fridge before straining.
The agitation accelerates extraction, getting you a drinkable result in half the usual time. The trade-off is that the flavour is slightly less smooth and a little more forward-tasting than the traditional passive steep. It’s a perfectly decent weekday hack, though. Once you’ve built confidence in how to make cold brew coffee the standard way, this variation is fun to experiment with.
Cold Brew vs. Iced Coffee: What’s the Real Difference?
People often use these terms interchangeably, but they’re genuinely different drinks — and understanding the distinction is part of mastering how to make cold brew coffee.
Iced coffee is hot-brewed coffee (drip, pour-over, or espresso) that’s been chilled and poured over ice. It’s quick to make but tends to taste more acidic and can turn watery as the ice melts.
Cold brew is never exposed to heat at any point. The cold-water extraction process produces a naturally sweeter, less acidic, more concentrated liquid. It’s also more shelf-stable than iced coffee, which should ideally be drunk the same day.
If you or someone you brew for is sensitive to coffee’s acidity or bitterness, knowing how to make cold brew coffee is genuinely useful — the cold extraction method pulls significantly fewer of the acidic compounds that cause discomfort for many people.
Final Thoughts
Learning how to make cold brew coffee at home is one of those small kitchen skills that pays dividends every single week. The process is slow by design, but almost entirely hands-off — you combine coffee and water, wait, strain, and enjoy. There’s nothing technically difficult about it, and once you’ve nailed your preferred ratio and steep time, you’ll wonder why you ever paid café prices for a bottle of concentrate.
Start with a medium-dark roast, a coarse grind, and a 1:4 ratio steeped cold for 20 hours. That single formula covers 80% of what you need to know about how to make cold brew coffee. Taste, adjust, and make it your own from there.
The best part? A single batch makes enough concentrate for a full week of morning drinks, and the total hands-on time is under 10 minutes. That’s a genuinely great return on effort.
Frequently Asked Questions
How long does it take to make cold brew coffee?
The actual hands-on time for how to make cold brew coffee is about 5–10 minutes of prep and another 5 minutes of straining. The steep itself — the part where you wait — takes 12–14 hours at room temperature or 18–24 hours in the fridge. Plan ahead the night before and your cold brew will be ready by morning.
What’s the best coffee-to-water ratio for cold brew?
A 1:4 ratio by weight (coffee to water) produces a strong concentrate you dilute before drinking. If you prefer a ready-to-drink brew, use 1:8. Both ratios work well — it really comes down to personal taste. When you first learn how to make cold brew coffee, start with 1:4 concentrate and dilute to your preference at serving time.
Can I reuse cold brew coffee grounds?
Technically yes, but the second steep will be noticeably weaker and thinner because most of the soluble flavour compounds were extracted in the first round. Some people do a second 24-hour steep with the spent grounds for a lighter, more delicate brew — worth trying once rather than throwing the grounds straight into compost. Don’t expect it to taste like your first batch.
Why does my cold brew taste bitter?
Bitterness in cold brew almost always points to one of two things: grounds that were too fine, or a steep time that ran too long. Both lead to over-extraction. The fix for how to make cold brew coffee without bitterness is simple — grind coarser and pull the coffee at the lower end of your steep-time range. Filtered water also helps if your tap water has an off taste.